
Screencasting
A screencast setup for developers
Your daily machine is tuned for doing the work. A capture environment is tuned for somebody else understanding it.
A working machine is a bad capture environment
The Mac you write code on has been tuned for eighteen months to make you fast. Small fonts because you can read them. Three monitors because you use all of them. A browser signed into your accounts, a Dock with thirty apps, a wallpaper somebody took a photo of. Every one of those decisions is correct for work and wrong for video.
You do not need a different Mac. You need a different configuration of the same Mac that you can switch into in ten seconds and out of just as fast — because a setup that takes an hour to arrange is a setup you will skip on the day you actually want to record something. What follows builds that, in the order the decisions depend on each other.
The highest-leverage move is a recording user account
Almost everything else on this page is a setting you would otherwise change and change back, twice, every time you record. A second macOS user account makes all of it persistent. Log in, and the desktop is already the recording desktop: its own Dock, its own wallpaper, its own menu bar extras, its own browser profile with no history and no avatar, its own editor settings with the large font.
The cost is one-time and small. You install nothing twice, because applications are shared — but each account keeps its own app settings and its own privacy grants, so plan on a short setup pass in the recording account before your first real take.
- 01
Create the account and log into it once, properly
Set the wallpaper to something flat and dark, empty the Dock down to the apps that will appear on screen, and remove the menu bar extras you do not want in frame. This is the pass you will never repeat.
- 02
Grant the permissions the session needs
Your recorder needs Screen Recording. Show KeyPress needs Input Monitoring — the only privacy permission it asks for, and not Accessibility or Screen Recording. Sort both here, before there is a take waiting on it, because the prompt drops you into System Settings.
- 03
Set up the editor and terminal for a viewer, not for you
Large font, high-contrast theme, short prompt, no minimap, no inline hints. In a separate account you can leave these permanently absurd without them following you back into your working day.
- 04
Give the browser a clean profile
Signed out, no bookmarks bar, no extensions with badges, no avatar in the corner. A profile in the recording account is far easier to keep clean than a profile you also use.
- 05
Place the overlay once and leave it
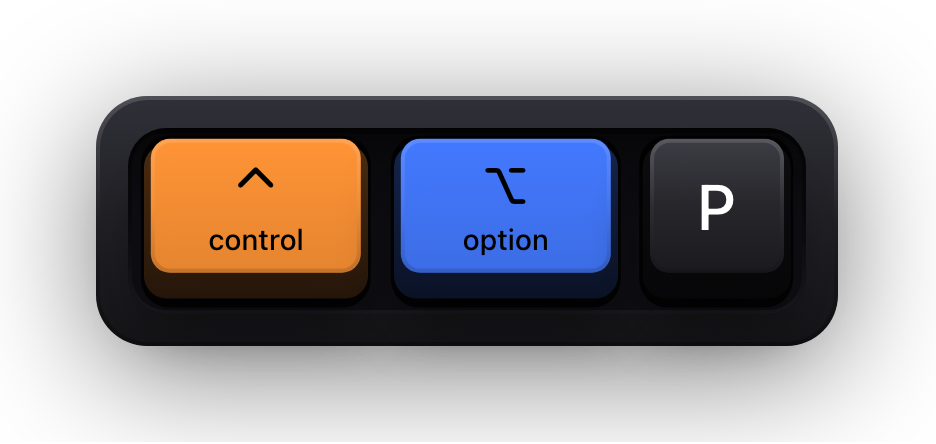
Placement is saved per physical display, so the corner you choose here for your recording monitor stays put. One of the eight edge presets covers most layouts; ⌃⌥P opens the full-screen drag editor with snapping for anything else.
Pick the capture resolution from the delivery, not the monitor
This is the decision everything visual downstream depends on, and it goes the opposite way to instinct. Your display's native resolution is close to irrelevant; what matters is the resolution the video is delivered at, because that is the scale the text has to survive.
Recording a large display and downscaling to 1080p means every glyph is being resampled — readable, but soft, and comments and low-contrast syntax colours go first. Recording closer to the delivery resolution keeps text crisp and makes the file smaller, at the cost of screen real estate you give up while recording. Apple's Displays settings let you choose a resolution directly, and Show all resolutions exposes the ones the picker hides by default.
| What you deliver | Practical capture approach | The trade |
|---|---|---|
| 1080p course video or YouTube | Run the recording display at a resolution near 1920 by 1080 and capture it whole | Least screen space, sharpest text — usually the right call for code |
| 1440p or 4K, watched mostly full screen | Capture the display natively and let the platform scale down | Comfortable to work in, but check comment text in a real test export |
| A short clip for a pull request or a chat thread | Capture a region around the two windows that matter | Fast, and nobody minds the crop — but an overlay outside the crop is not in the clip |
| Documentation embedded in a page at half width | Capture near the delivery size and treat everything as twice as small as it looks | The most common place text quietly becomes unreadable |
The desktop the viewer actually sees
Watch somebody else's screencast and notice how much of the frame is not the subject. The Dock. A second window's edge. A wallpaper with detail in it. A tab bar with fifteen favicons. A menu bar with a VPN indicator and a battery percentage. None of it is malicious, and all of it competes with the code.
The rule is not minimalism for its own sake — it is that anything on screen which is not the lesson will be read by somebody, and that reading is time they are not spending on the lesson.
- Hide the Dock, or empty it. It is the largest permanently occupied strip of a screencast.
- Close every window that is not in the video, including the ones behind the editor — they show as slivers at the edges.
- Use a flat, dark wallpaper. Detail behind a semi-transparent title bar is worse than any solid colour.
- Turn on Do Not Disturb from Control Center so notifications are silenced for the session.
- Read your menu bar left to right before the first take, and read it again after any app update adds an item to it.
The overlay layer
Two things about a developer's work are invisible in a capture: what the keyboard did, and where the pointer is. Both have a fix that costs nothing at record time, and both can be overdone.
Show KeyPress draws each key press as a mechanical keycap in an always-on-top window. It is a display and nothing else — it records no video, has no plugin for any recorder or conferencing tool, and holds no network entitlement, so there is nothing to integrate and nothing leaves the Mac. Because it is drawn on the display, anything that captures the display captures it; anything scoped to one application window does not, which is the single failure mode worth remembering.
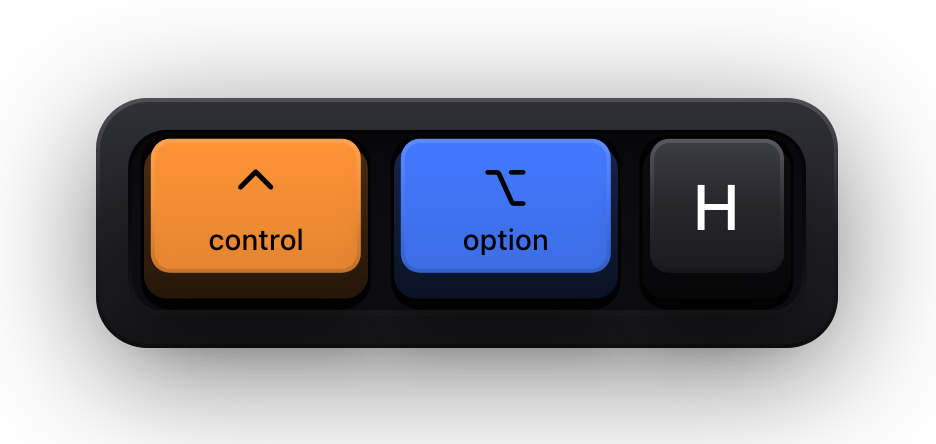
The cursor halo is the second layer, on its own toggle at ⌃⌥H, and it is the one to be sparing with. It genuinely helps when the pointer is the subject — a drag, a resize, a menu path — and it is noise the rest of the time. The animated pet is the third, and the only element that is not click-through, which is reason enough to leave it off for anything instructional.
- Pin the display target to One Display while recording. Follow Pointer is the right default at a desk and will take the overlay off the captured screen the moment you glance at a second monitor.
- Set the size one step larger than looks right locally; ⌃⌥= and ⌃⌥- step through the presets live without opening Settings.
- Bottom-centre and bottom-right clear most editor layouts. Bottom-left is often the only clear corner when the terminal is docked to the right.
- Nine keyboard theme families ship, plus one autosaved custom theme, so the overlay can be matched to your video's palette rather than fighting it.
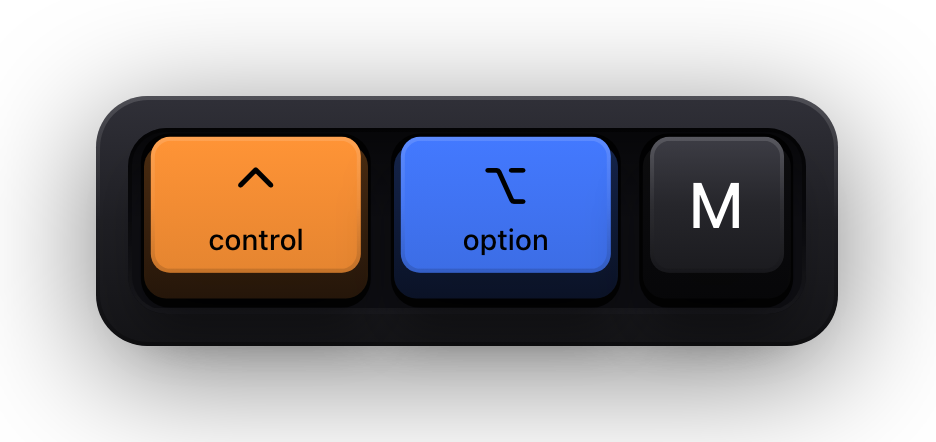
- ⌘⇧K is the master switch for the whole visualization — worth having in muscle memory before you need it.
When the built-in recorder is enough, and when it is not
Shift-Command-5 records the entire screen with no configuration, writes a file when you stop, and is the correct tool for most developer screencasts. It has no scenes, no camera compositing, no per-source audio and no transitions, and for a straight walkthrough it needs none of those.
OBS Studio earns its place at a specific point: when you want a camera in the corner, more than one arrangement of sources, or separate audio tracks you can fix in the edit. The important detail carries over unchanged — an OBS source that captures a display includes the overlay, and one scoped to a window or an application does not.
Adjacent
The OBS side of the same setup
Display capture versus window capture, where the overlay sits in a scene, and why there is no plugin to install.
Read moreAdjacent
Recording with the built-in tools
Shift-Command-5 and QuickTime, and the settings that decide whether a recording is readable afterwards.
Read moreAudio, briefly and honestly
Audio is not a screen setting, but it is the thing viewers abandon a tutorial over faster than any visual problem, so it belongs in the setup rather than in the edit. A microphone close to your mouth in a room with soft furnishings beats an expensive one across a desk in a room with none.
The developer-specific hazard is your own keyboard. A loud mechanical board picked up by an open microphone turns every shortcut into a burst of noise underneath your voice — which is a real argument for showing the keys visually and letting the audio carry only the explanation.
The thirty-second check before every session
- Logged into the recording account, not your working one.
- Do Not Disturb on, chat and mail quit rather than minimised.
- The display is at the resolution you record at, and the capture covers the whole of it.
- The overlay is on the captured display, sized and placed clear of the editor gutter and the terminal.
- Content mode matches the session — Shortcuts Only by default, All Keys for typing-led segments.
- A ten-second test capture, watched at delivery size, before the real take.
Sources and further reading
Product details and guidance were checked against these first-party pages on August 5, 2026. Re-check current listings before making an install or high-stakes decision.
- Change Displays settings on Mac
Apple
Apple's Displays settings reference, including the Resolution control and the Show all resolutions option.
- Take a screenshot or record your screen on Mac
Apple
Apple's instructions for the built-in screenshot and screen recording tools.
- OBS Studio — Sources
OBS Project
How OBS captures a display or window, which is what puts an on-screen overlay into a stream.
- Control access to input monitoring on Mac
Apple
Apple's guide to the Input Monitoring privacy permission and how to grant or revoke it.
FAQ
Questions people ask
Is a separate macOS account really worth the trouble?
It is if you record more than occasionally. The alternative is changing a dozen settings before every session and changing them back afterwards, which is exactly the friction that stops people recording. Set it up once and logging in becomes the whole preparation.
What resolution should I record a developer screencast at?
Work backwards from delivery. If the video ships at 1080p, running the recording display near that resolution keeps small type readable; capturing a much larger display and downscaling softens exactly the low-contrast syntax colours you need people to read.
Does the keystroke overlay need Screen Recording permission?
No. Show KeyPress requests Input Monitoring and nothing else. Screen Recording is a permission your recorder needs in order to capture the display, and it is granted to that app rather than to the overlay.
Will the overlay appear if I capture a single window?
Usually not. The keycaps are drawn in a separate always-on-top window, so a capture scoped to your editor's window carries the editor's pixels and nothing else. Capture the display, or crop a display capture to the region you want.
Can I use this setup for live calls as well as recordings?
The desktop and overlay parts carry over directly — a clean screen and visible shortcuts help a call for the same reasons. The resolution advice does not: conferencing tools re-encode heavily, so size the overlay for the worst connection in the meeting rather than for a file.