
Guide
How to show keystrokes on screen on a Mac
Nobody watching your screen can see your hands. An on-screen overlay is the only thing that closes that gap.
What macOS gives you, and what it does not
There is no system setting that puts your key presses on screen for other people to read. macOS has accessibility tools for entering text and a screen recorder for capturing the display, but nothing that answers the question a viewer actually has, which is what did you just press.
So the shape of the solution is always the same: a small always-on-top window that watches key events and draws them. Everything else is detail — how it reads, where it sits, and what it is allowed to see.
That detail matters more than it sounds. An overlay that shows every keystroke as raw text is unreadable at 1080p. An overlay that sits in the middle of the screen covers the thing you are demonstrating. An overlay that keeps showing keys while you type a password is a liability.
Set it up in about five minutes
- 01
Install from the Mac App Store
Show KeyPress is a paid app distributed only through the Mac App Store, and it requires macOS 14 Sonoma or later. It is sandboxed, which is part of why its permission footprint is as small as it is.
- 02
Grant Input Monitoring
On first launch the app asks for Input Monitoring in System Settings under Privacy & Security. This is the only privacy permission it requests — not Accessibility, not Screen Recording. Without it, macOS will not deliver key events and the overlay stays empty.
- 03
Pick how the keys read
Latest shows only the newest combination and replaces it on the next press. Horizontal History keeps a row of recent keycaps. Stacked History groups continuous typing into readable fragments. Choose by what you are demonstrating, not by what looks busiest.
- 04
Decide what counts as a keystroke
All Keys shows everything you type. Shortcuts Only shows just the combinations, which keeps a demo clean when you are also typing prose. Standalone modifiers, function keys and special keys have their own switches on top of that.
- 05
Place it and save the position
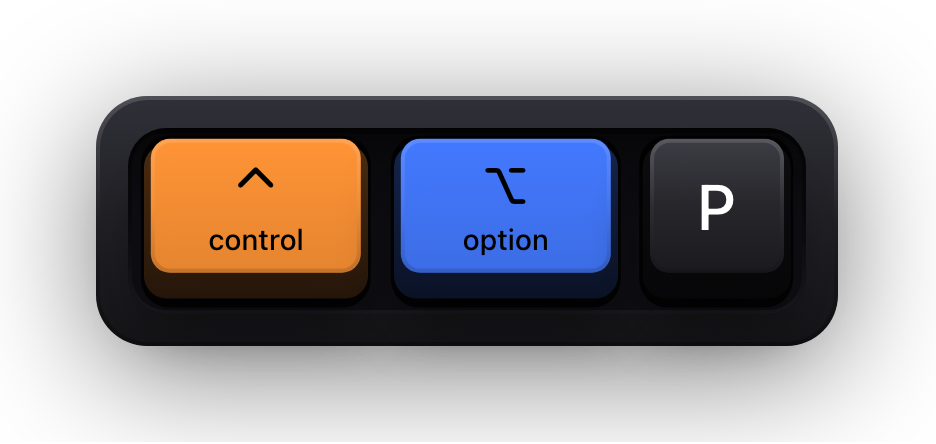
Eight edge presets cover the usual spots, and the full-screen drag editor — ⌃⌥P from anywhere — handles anything else, with snapping and guides. Positions are normalised, so they survive a resolution change, a scaling change, and the menu bar or Dock moving.
- 06
Check it against real work
Type the shortcuts you actually plan to demonstrate and watch the overlay, not the settings window. Adjust the key timeout, the maximum keys and the size preset until a press is readable for as long as it takes to say what it does.
Latest, Horizontal History, or Stacked History
These are three genuinely different reading experiences, not three intensities of the same thing. Picking the wrong one is the most common reason an overlay feels noisy.
| Mode | What appears | Best for | Trade-off |
|---|---|---|---|
| Latest | Only the newest key or combination, replacing whatever came before | Shortcut demos and teaching, where each press is a discrete instruction | Fast typing collapses into one flickering keycap |
| Horizontal History | A row of recent keycaps, ageing out on a timeout | Streams and short typing demos where the last few presses matter | Long words push the row wide across the screen |
| Stacked History | Continuous typing grouped into readable fragments rather than loose keys | Anything where words and sentences are the point, not individual presses | Per-keycap detail gives way to the fragment |
All Keys or Shortcuts Only
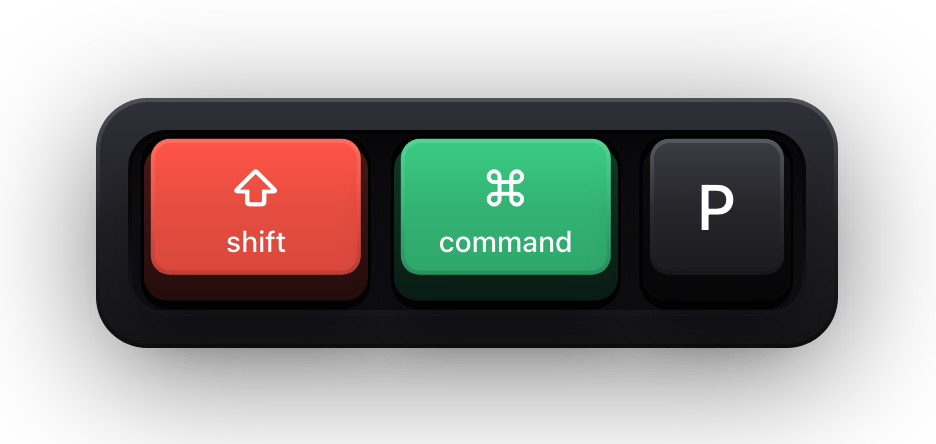
The content mode decides what is worth drawing at all. All Keys mirrors everything. Shortcuts Only draws combinations and leaves plain typing alone, which is usually the right default for a tutorial: the audience needs to see ⇧⌘P, not the fourteen characters you typed into the search box afterwards.
- Standalone modifiers have their own switch, so a bare Command tap can be shown or ignored.
- Function keys and special keys are controlled separately from letters and digits.
- The key timeout decides how long a press stays visible after you release it.
- In the history modes, Maximum Keys caps how many items can be on screen at once.
- Duplicate handling decides whether a held or repeated key stacks up or collapses.
- Press animations can be turned off entirely if the movement distracts from the work.
Where the overlay lives on a multi-display Mac
A single saved position is not enough once a second display is involved, because the right corner on a laptop screen is the wrong corner on a 32-inch monitor. Show KeyPress keeps a separate placement for every physical display and identifies displays in a way that survives unplugging and reordering them.
- Follow Pointer moves the overlay to whichever display your cursor is on.
- One Display pins it to a single screen, which is what you want when you present from one and read notes on another.
- Selected Displays shows it on a chosen subset — useful with a mirrored or dedicated capture display.
- The keyboard overlay is click-through, so it never intercepts a click meant for the app underneath.
What the overlay must never show
The point of an on-screen keystroke display is that other people can read it, which makes the failure case obvious. macOS has a mechanism for this: while Secure Input is active — as it is in password fields and in terminals with Secure Keyboard Entry enabled — applications stop receiving key events.
Show KeyPress clears the keyboard visualization for the duration, so no keycap is drawn and no keystroke reaches whatever is recording. In their place a short banner reads Keyboard hidden — Secure Input, which is the app telling you it stood down rather than crashed. If you would rather the screen showed nothing at all, turn off Show Status HUD in Settings under General. Key events are processed on device and never written to disk or sent anywhere.
Sources and further reading
Product details and guidance were checked against these first-party pages on August 5, 2026. Re-check current listings before making an install or high-stakes decision.
- Control access to input monitoring on Mac
Apple
Apple's guide to the Input Monitoring privacy permission and how to grant or revoke it.
- Secure Keyboard Entry
Apple
How macOS Secure Keyboard Entry stops other apps from receiving key events.
- Show KeyPress on the Mac App Store
Apple
The listing, with the current price, system requirements and version history.
FAQ
Questions people ask
Does showing keystrokes on screen need Accessibility permission?
No. Show KeyPress requests Input Monitoring and nothing else. Some visualizers use Accessibility instead, which is a broader grant, so it is worth checking what any app you install actually asks for.
Will my password show up on the overlay?
No. While macOS Secure Input is active — in password fields, and in terminals with Secure Keyboard Entry on — applications do not receive key events at all, and the keyboard visualization is cleared until it ends. A short Keyboard hidden — Secure Input banner appears in its place, and that banner can be switched off under General.
Does the overlay appear in screen recordings and shares?
It is a normal on-screen window, so anything capturing that display captures it too. Capturing a single application window is the exception, since the overlay is drawn outside that window.
Does it work with non-English keyboard layouts?
Yes. Keys are labelled from your active layout. The one exception is Control combinations: macOS reports a control character rather than a letter, so the app falls back to the US label for that physical key. The app's own interface is localised in English, Russian, German, Spanish and French.
Is there a free version?
No. Show KeyPress is a paid app on the Mac App Store with no free tier or trial. Check the listing for current pricing and system requirements.