
Teaching
A keyboard overlay for tutorials and course videos
A tutorial fails at the moment a student cannot tell which keys you pressed. These are the settings that decide whether the overlay teaches or just decorates.
Match the mode to what you are teaching
The single biggest quality decision is how much of your keyboard history is on screen at once. Show KeyPress offers three presentations, and they are not interchangeable — each one is right for a different kind of lesson.
Latest shows only the newest key or combination, replacing it with the next. It is the right default for teaching shortcuts, because there is never any ambiguity about which combination goes with what you just said. Horizontal History keeps a row of recent keys with the mechanical keycap presentation. Stacked History groups continuous typing into readable fragments instead of a lengthening row of single caps.
Shortcut lessons
Latest
One combination at a time. Best for shortcut lessons, menu-versus-keyboard comparisons, and anything you narrate key by key.
Short sequences
Horizontal History
A row of recent keys that fades over time. Good for short sequences where the order matters and the sequence is only a few keys long.
Typing-heavy lessons
Stacked History
Continuous typing grouped into fragments rather than a row of individual caps. This is what earns its place in terminal work, in code, and anywhere you type whole words at speed.
Content mode
Shortcuts Only
A content mode, not a presentation. Plain letters are suppressed and only combinations appear — the fastest way to stop a lesson's overlay from becoming noise.
When Stacked History beats Latest
Latest has a failure case, and it shows up the moment you type quickly. Each key replaces the previous one, so a fast sequence becomes a flicker: the student sees the last key and infers the rest. If the sequence itself was the point — a git command, a filename, a regex — the lesson is lost.
Stacked History fixes this by keeping the fragment on screen as a unit. Instead of eleven keycaps flashing past, the student reads what you typed. That is why terminal tutorials, live-coding lessons and text-editing walkthroughs are better served by Stacked History even though Latest is the cleaner-looking mode.
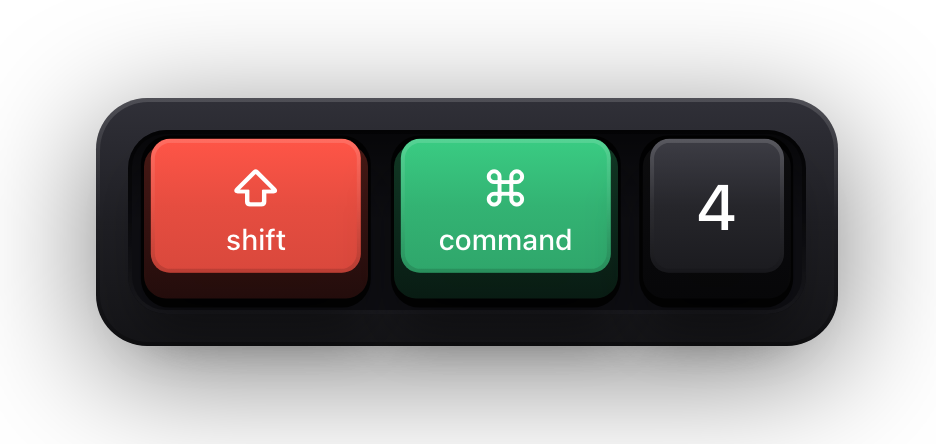
The reverse case is just as real. In a lesson about ⇧⌘4 or ⌥-click, a history strip is clutter: there is nothing to remember, only one combination to see clearly. Use Latest, raise the timeout so the combination stays up while you explain it, and let it replace itself when you move on.
All Keys versus Shortcuts Only
Content mode is a separate axis from presentation, and it is the one that decides how much of your typing the student is subjected to. All Keys shows everything. Shortcuts Only shows combinations and suppresses plain typing, so the overlay stays quiet during prose and speaks up exactly when you use the keyboard as a tool.
For most course material, Shortcuts Only is the better default. The student is there to learn the shortcuts; watching you type an email subject line teaches nothing and costs attention. Switch to All Keys for the segments where the characters matter, and switch back afterwards.
You do not have to open settings to do this. A global shortcut — ⌃⌥M by default — switches content mode from wherever you are, so you can flip modes mid-take between segments.
- Standalone modifiers have their own toggle. Turn them off and a lone ⇧ or ⌘ no longer appears every time you reach for a capital letter.
- Function keys and special keys have separate toggles as well, so a lesson that never touches F-keys can suppress them entirely.
- Duplicate handling decides whether a repeated key stacks up or shows once — useful when you hold an arrow key to scroll.
Readable at the size students watch
Course video is watched compressed, windowed, and often on a phone. A 16-pixel keycap that looks generous on a 5K display is unreadable when the same frame is 480 pixels wide in a course player. Judge the overlay at the size of the final playback, not the size of your monitor.
There are three size presets, and ⌃⌥= and ⌃⌥- step through them without opening settings — so you can size the overlay against a test export rather than by guesswork. Opacity is separate: a semi-transparent overlay that looks tasteful at full resolution loses contrast badly after compression, so keep it high for teaching material.
Three keycap styles are available. Mechanical is the most legible at small sizes because the depth and shadow give each cap a hard edge; Flat and Minimal read as cleaner but rely on more subtle contrast. Nine theme families plus one autosaved custom theme let you match your course's visual identity without giving up that contrast.
- 01
Record thirty seconds of the real lesson
Not a test pattern — actual typing at your actual speed, in the app you actually teach in.
- 02
Watch it at the delivery size
Shrink the player to the width your course platform uses, or watch it on a phone. This is where over-small keycaps and low opacity fail.
- 03
Adjust size, opacity and timeout
Step the size with ⌃⌥= until the caps read at delivery size. Raise the timeout if combinations vanish before your narration catches up.
- 04
Fix the placement
Press ⌃⌥P for the drag editor and move the overlay clear of subtitles, your course platform's chrome and any lower-third graphics. Snapping and guides keep it aligned; Done confirms, Reset restores the default.
- 05
Lock it in per display
Placement is saved separately for each physical display, so your recording monitor keeps its lesson-ready placement even when you work elsewhere.
Things that catch tutorial makers out
- The keycaps disappear in the password segment. That is macOS Secure Input, not a bug — key events do not reach the app, so the keyboard overlay is cleared and a short banner reading “Keyboard hidden — Secure Input” appears in its place.
- With Follow Pointer, moving your mouse to a second monitor takes the overlay with it. Set One Display while recording.
- Caps Lock is not visualised; macOS does not report it reliably enough.
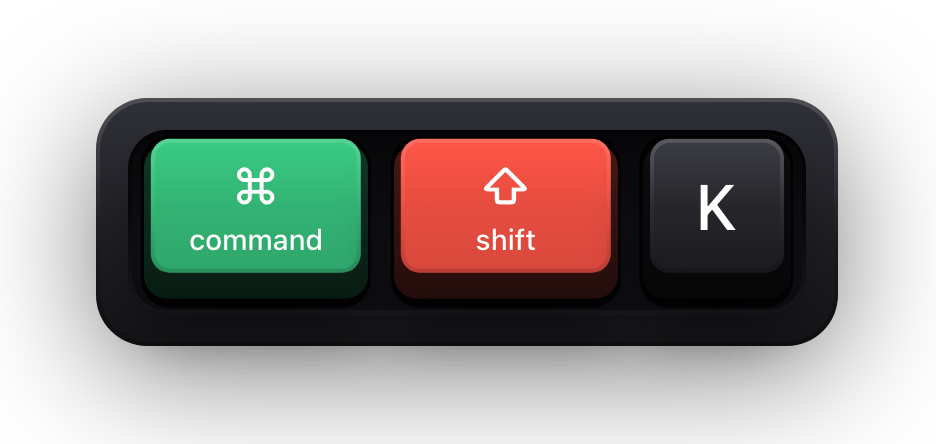
- Your start and stop keystrokes end up in the recording. Toggle the app with ⌘⇧K before you reach for the stop control, or trim the tail.
- If your course is multilingual, the interface is localised in English, Russian, German, Spanish and French — and the visualisation itself follows your keyboard layout rather than forcing US key labels.
Sources and further reading
Product details and guidance were checked against these first-party pages on August 5, 2026. Re-check current listings before making an install or high-stakes decision.
- Secure Keyboard Entry
Apple
How macOS Secure Keyboard Entry stops other apps from receiving key events.
- Take a screenshot or record your screen on Mac
Apple
Apple's instructions for the built-in screenshot and screen recording tools.
- Show KeyPress on the Mac App Store
Apple
The listing, with the current price, system requirements and version history.
FAQ
Questions people ask
Which mode should I use for a shortcut tutorial?
Latest with Shortcuts Only. One combination stays on screen until the next one replaces it, and plain typing never appears, so every visible keycap corresponds to something you are explaining.
Why do fast sequences look like a flicker?
With Latest, every key replaces the previous one, so a quick sequence never resolves into something readable. Switch to Stacked History, which groups continuous typing into fragments a student can actually read.
How large should the overlay be for course video?
Large enough to read at the size students watch, which is usually smaller than the size you record at. Export a short test, view it at the delivery resolution, and step the size with ⌃⌥= until the keycaps are legible.
Can I change settings without stopping the recording?
Yes for the ones that matter mid-take. Global shortcuts cover app state, content mode, size and the positioning editor, so you can switch between All Keys and Shortcuts Only or resize the overlay without opening the settings window.