
App shortcuts
Xcode keyboard shortcuts for Mac
Apple publishes no static shortcut reference for Xcode. These chords were read from the Key Bindings pane in Xcode 26.6, which is the authoritative list for any installation.
Why there is no published list of Xcode shortcuts
Every other app on this site has a shortcut reference with its vendor's name on it. Xcode does not. Apple's current documentation explains how to view, change and resolve conflicts between key bindings, and stops there — it does not print the combinations themselves, in Xcode Help or in the developer documentation.
The only shortcut tables Apple ever published for Xcode sit in a retired document that was last updated in 2011, for an Xcode several major versions behind anything you can install today. A stale chord is worse than no chord: it is the one thing on a reference page a reader will actually test, and it fails in front of them.
Xcode being Mac-only removes the usual trap, which is a Windows list quietly translated into ⌘ symbols. It replaces it with a subtler one. Apple moves bindings between major releases, so a combination someone blogged about two Xcode versions ago may now belong to a different command entirely — and there is no published list to check it against.
Where the chords on this page came from
Apple publishes no static shortcut reference for Xcode, so every chord below was read from Xcode's own Key Bindings pane in Xcode 26.6 (build 24959) — the authoritative list for any installation — rather than from a document.
That is a stronger source than it sounds, not a weaker one. The pane is not a description of Xcode's shortcuts written by somebody; it is the mechanism, the thing Xcode actually consults when you press a key. A published table can drift out of date without anyone noticing. The pane cannot.
It does mean the list is a snapshot of one installation, and yours can legitimately differ. A custom key bindings set, a set you duplicated and forgot to switch back from, a changed binding, or a system-wide shortcut claiming a combination first will all move things around. That is exactly why the pane, and not this page, is the last word — and the walkthrough below shows how to read yours in about a minute.
Moving around a workspace
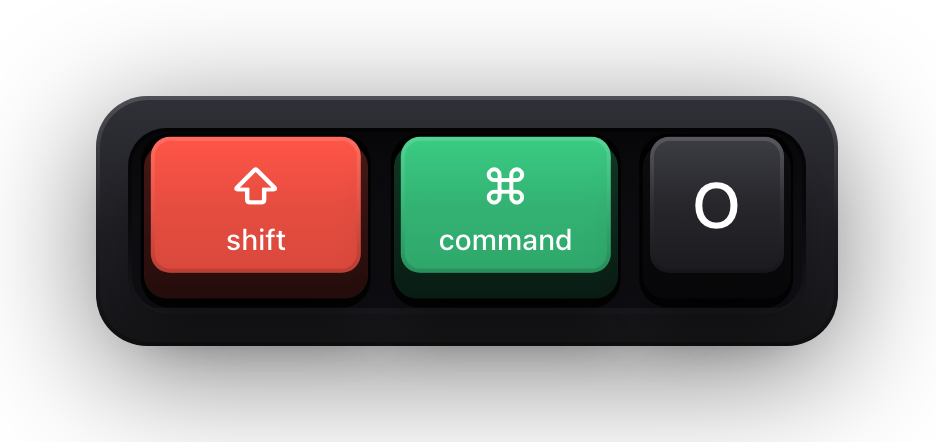
⇧⌘O — Open Quickly — is the chord that replaces the project navigator entirely. It matches file names and symbol names at once, so a class you can half remember is two seconds away without knowing which group it lives in.
The two history chords are the ones that make jumping safe. ⌃⌘← walks back to where you were before the last jump and ⌃⌘→ walks forward again, which is what lets you chase a definition four files deep and get home. The numbered ⌘ chords select navigators rather than files.
| Shortcut | What it does |
|---|---|
| ⇧⌘O | Open Quickly, by file name or symbol name |
| ⇧⌘J | Reveal the current file in the project navigator |
| ⌘J | Move focus to an editor pane |
| ⌃⌘J | Jump to the definition of the symbol under the cursor |
| ⌥⌘L | Jump to the current selection |
| ⌃⌘← | Show the previous location in history |
| ⌃⌘→ | Show the next location in history |
| ⌘' | Jump to the next issue |
| ⌘" | Jump to the previous issue |
| ⌘1 | Show the project navigator |
| ⌘2 | Show the source control navigator |
| ⌘5 | Show the issue navigator |
| ⌘7 | Show the debug navigator |
| ⌘9 | Show the report navigator |
| ⌥⌘J | Focus the filter field at the bottom of the navigator |
Editing and formatting code
⌃I is the chord to reach for after every paste. It re-indents the selection to the file's own rules, which is faster and more predictable than fighting the editor line by line, and it is why pasted code stops looking pasted.
⌘/ comments the selection and uncomments it again on a second press, and ⌥⌘/ generates a documentation comment for the declaration under the cursor — parameter names, return value and all. The four format commands are separate from re-indenting, and act on a width, a selection or the whole file.
| Shortcut | What it does |
|---|---|
| ⌘/ | Comment or uncomment the selection |
| ⌥⌘/ | Add a documentation comment for the declaration |
| ⌃I | Re-indent the selection |
| ⌘[ | Shift the selection left |
| ⌘] | Shift the selection right |
| ⌥⌘[ | Move the line up |
| ⌥⌘] | Move the line down |
| ⌃⌥I | Reformat to the page guide width |
| ⌃M | Format the call at the cursor onto multiple lines |
| ⇧⌃I | Format the whole file |
| ⇧⌥⌃I | Format the selection |
| ⌃Space | Show the completion list |
| ⌃⌥Space | Show the predictive completion |
| ⌃⌘E | Edit every occurrence of the symbol in the current scope |
| ⌥⌃⌘F | Fix all issues in the file |
Folding, columns and the editor view
Folding in Xcode is built on ⌥⌘ plus an arrow, and the modifiers widen the scope rather than change the direction: add ⇧ to fold every method in the file, or ⇧⌃ to fold the comment blocks and leave the code alone.
⇧⌃↑ and ⇧⌃↓ extend a rectangular column selection, which is the fastest way to add the same suffix to twelve lines of a Swift enum. The three view toggles at the bottom of the table are the ones worth knowing before a demo, because a minimap and an authors gutter both eat width you may want back.
| Shortcut | What it does |
|---|---|
| ⌥⌘← | Fold the block at the cursor |
| ⌥⌘→ | Unfold the block at the cursor |
| ⇧⌥⌘← | Fold every method and function in the file |
| ⇧⌥⌘→ | Unfold every method and function |
| ⇧⌃⌘← | Fold the comment blocks |
| ⇧⌃⌘→ | Unfold the comment blocks |
| ⇧⌃↑ | Extend a column selection upward |
| ⇧⌃↓ | Extend a column selection downward |
| ⌘+ | Increase the editor font size |
| ⌘- | Decrease the editor font size |
| ⌃⌘0 | Reset the editor font size |
| ⇧⌃⌘M | Show or hide the minimap |
| ⇧⌃⌘A | Show or hide the authors gutter |
| ⇧⌃⌘L | Toggle line wrapping |
| ⌃⌘L | Show all issues inline |
Finding, in a file and across a workspace
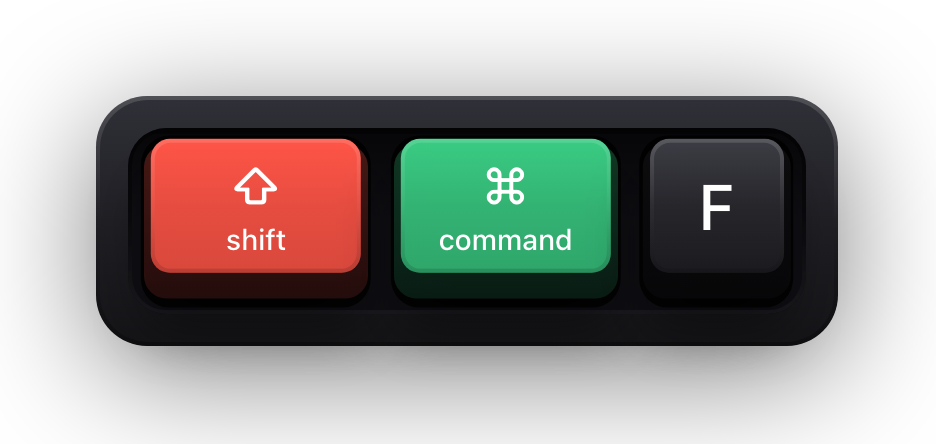
Xcode keeps two parallel find systems and gives the workspace-wide one an extra modifier: ⌘F finds in the file, ⇧⌘F finds across the workspace, and the same pattern holds for replace and for stepping through results.
⌘E is the chord that pays for itself. It loads the current selection into the find buffer, so the sequence select, ⌘E, ⌘G finds the next occurrence of whatever your cursor is on without ever opening the find bar. ⇧⌃⌘F does the same at workspace scale for a symbol, and ⇧⌃⌘H opens its call hierarchy.
| Shortcut | What it does |
|---|---|
| ⌘F | Find in the current file |
| ⌥⌘F | Find and replace in the current file |
| ⌘G | Find the next match |
| ⇧⌘G | Find the previous match |
| ⌥⌘G | Find and select the next match |
| ⇧⌥⌘G | Find and select the previous match |
| ⌘E | Use the selection for find |
| ⇧⌘E | Use the selection for replace |
| ⌥⌘E | Select the next occurrence |
| ⇧⌥⌘E | Select the previous occurrence |
| ⇧⌘F | Find in the workspace |
| ⇧⌥⌘F | Find and replace in the workspace |
| ⌃⌘G | Find the next match in the workspace |
| ⇧⌃⌘F | Find the selected symbol in the workspace |
| ⇧⌃⌘H | Show the call hierarchy for the selected symbol |
Building, running and testing
⌘B builds, ⌘R runs, ⌘U tests and ⌘. stops whatever is going — four chords that cover most of a working day. The variants with ⌃ skip the build step, which is how you re-run a binary you already have without waiting for a compile you know is unnecessary.
⇧⌘K cleans the build folder and asks first; ⇧⌥⌘K cleans immediately without the dialog. Reach for the second one only when you mean it, because it is the fastest way to throw away a derived data cache you would rather have kept.
| Shortcut | What it does |
|---|---|
| ⌘B | Build |
| ⌘R | Run |
| ⌘. | Stop |
| ⌘U | Test |
| ⌘I | Profile in Instruments |
| ⇧⌘B | Analyze |
| ⇧⌘K | Clean the build folder, with a confirmation |
| ⇧⌥⌘K | Clean the build folder immediately |
| ⌃⌘R | Run without building |
| ⌃⌘U | Test without building |
| ⌃⌘I | Profile without building |
| ⌃⌘B | Compile the current file only |
| ⌥⌃⌘U | Test the selected items |
| ⌃0 | Choose a scheme |
| ⌘< | Edit the current scheme |
Debugging
The stepping keys are F6, F7 and F8, which on a Mac laptop means fn is part of the chord unless you have turned on the option to use the top row as standard function keys in System Settings under Keyboard. That one setting is what makes the debugger usable from the keyboard.
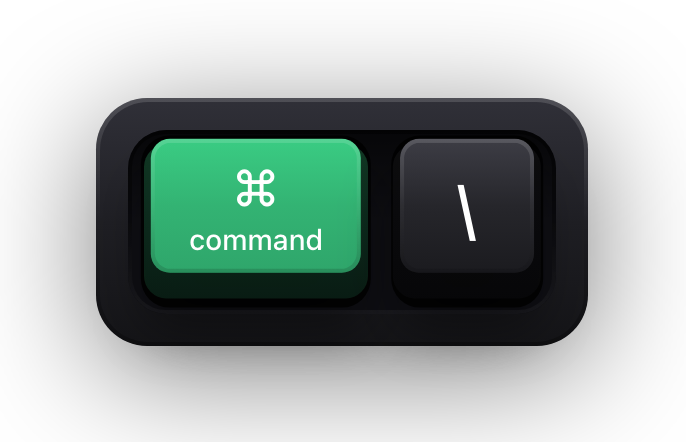
⌘\ sets a breakpoint on the current line without aiming at the gutter, ⌘Y deactivates every breakpoint at once when you want a clean run, and ⌃⌘C continues to wherever the cursor happens to be — a one-shot breakpoint you never have to remove.
| Shortcut | What it does |
|---|---|
| ⌘\ | Create a breakpoint on the current line |
| ⌥⌘\ | Create a symbolic breakpoint |
| ⌘Y | Activate or deactivate all breakpoints |
| ⌃⌘Y | Pause or continue |
| F6 | Step over |
| F7 | Step into |
| F8 | Step out |
| ⌃F6 | Step over one instruction |
| ⌃⌘C | Continue to the current line |
| ⇧⌘Y | Show or hide the debug area |
| ⇧⌘C | Activate the console |
| ⌘K | Clear the console |
| ⌥⌘K | Reload the console |
| ⇧⌥⌘J | Jump from a console entry to its source |
| ⌃C | Interrupt the debugger operation |
Windows, tabs and files
Xcode has three nested things that all look like tabs — window tabs, editor tabs and editor panes — and the New menu gives each its own chord. ⌘T adds a tab, ⌃⌘T opens an editor pane to the right, and ⌥⌃⌘T opens one below.
⌘W is deliberately vague, and the menu item says so in as many words: it closes the tab, the editor pane, the window tab or the window, whichever is innermost. When you need to be precise, the ⌥, ⌃ and ⇧ variants each name exactly one of them.
| Shortcut | What it does |
|---|---|
| ⌘T | New tab |
| ⇧⌘T | New window |
| ⌃⌘T | New editor pane on the right |
| ⌥⌃⌘T | New editor pane below |
| ⌘N | New file from a template |
| ⇧⌘N | New project |
| ⌘O | Open |
| ⌘S | Save |
| ⌥⌘S | Save all |
| ⌘W | Close the tab, editor pane, window tab or window |
| ⌥⌘W | Close the other tabs |
| ⌃⌘W | Close the document |
| ⌘{ | Show the previous tab |
| ⌘} | Show the next tab |
| ⌃⌘F | Enter or leave full screen |
Read your own bindings under Settings, Key Bindings
This takes about a minute and leaves you with a list that is correct for your Xcode, on your keyboard, including anything you changed and forgot about. It is worth doing once before a talk or a recording rather than discovering a conflict live.
- 01
Open the pane
Key Bindings preferences hold every binding Xcode knows about. Each one associates an action — selecting a menu item, or an operation on selected text — with the key sequence that triggers it.
- 02
Filter by category
Above the list, click a category to narrow it. Menu covers Xcode's menu actions and Text covers text-editing operations, which is the fastest way to stop hunting through several hundred rows at once.
- 03
Search by description or by shortcut
Type into the search field, then click the search options icon and choose whether to match action descriptions, keyboard shortcuts, or both. Searching by shortcut is how you answer the question the other way round: what does this combination already do?
- 04
Change a binding
Find the action, double-click its shortcut to select it, type the combination you want instead, then click elsewhere to apply the change.
- 05
Remove one without breaking it
Double-click the shortcut, then click the Delete button beside it. Do not press the keyboard Delete key — Apple warns that this assigns Delete as the shortcut rather than clearing it.
- 06
Give a text action a second shortcut
Text actions can carry more than one binding. Double-click the shortcut, click the Add button, and type the additional combination.
What the Key Bindings pane gives you
The controls below are the whole interface, and two of them do more than they look like they do. The search options icon lets you search by combination rather than by name, and the Conflicts filter answers the most common complaint about Xcode shortcuts without any guesswork.
| Control | What it does |
|---|---|
| All, Menu, Text | Filter the action list; Menu is Xcode's menu actions, Text is operations on selected text |
| Search field | Narrow the list to a specific action or search term |
| Search options icon | Choose whether the search matches action descriptions, keyboard shortcuts, or both |
| Conflicts | Show the combinations that have been assigned to more than one action |
| Double-click a shortcut | Select it, so the next combination you type replaces it |
| Delete button beside a shortcut | Remove the binding; pressing the keyboard Delete key assigns Delete instead |
| Add button beside a shortcut | Give a text action an additional binding |
| Key Bindings Set pop-up | Switch between sets, or choose Manage Key Bindings to create one |
| Duplicate in Manage Key Bindings | Copy the selected set under a new name, so the originals survive your experiments |
When a shortcut does nothing
Four things account for almost every report that an Xcode shortcut is broken, and the Key Bindings pane settles three of them without any guessing.
- Two actions have been given the same combination. Each shortcut can belong to only one action, so a duplicate is a conflict — click Conflicts above the action list to see every one of them, then adjust until the list is empty.
- A system-level shortcut has claimed it first. Apple notes that some of these conflict with Xcode's and take precedence, in which case Xcode never sees the press at all.
- You are in a key bindings set you forgot you made. Check the Key Bindings Set pop-up menu before assuming the default is what is loaded.
- It is a function key on a Mac keyboard whose top row sends media keys. Either hold fn, or turn on the option to use F1, F2 and so on as standard function keys in System Settings under Keyboard.
- If a combination is hard to read off a page at all, the Keyboard Viewer helps: switch on the Input menu in the menu bar, then choose Show Keyboard Viewer to see what a sequence maps to on your own layout.
Show Xcode shortcuts on screen while you teach
Xcode is an unusually bad app to watch someone else drive. The chords run three and four modifiers deep — ⇧⌥⌃I is four — and the visible result is often a subtle reformat or a jump to a file the viewer has never seen. If you are recording a Swift tutorial, running onboarding for a new iOS hire, or pairing over a screen share, the keyboard is the half of the story that never makes it onto the video, and since Apple publishes no list, a viewer cannot look the combination up afterwards either.
Show KeyPress is a paid macOS menu bar app, for macOS 14 Sonoma or later, that draws each key you press as a keycap on top of everything else on screen. There is no Xcode plugin, no source editor extension and no recording of its own — it is a window above your other windows, which is why any display capture picks it up without being told to.
- Stacked History groups continuous typing into readable fragments, which is what you want when the code itself is the lesson.
- Shortcuts Only draws combinations like ⇧⌥⌃I and leaves plain typing alone, for the parts where it is not.
- Function keys and special keys have their own switches, so an F6-heavy debugging demo can be shown or suppressed.
- The keyboard overlay keeps a separate saved placement for every display, so the laptop screen and the external monitor each remember their own corner.
- ⌃⌥P opens the full-screen drag editor with snapping and guides when a preset corner is not quite right.
Sources and further reading
Product details and guidance were checked against these first-party pages on August 5, 2026. Re-check current listings before making an install or high-stakes decision.
- Adjust keyboard shortcut mappings for menus and text operations
Apple
Xcode Help's page on the Key Bindings settings pane, which lists and edits every shortcut Xcode ships with.
- Xcode
Apple
Apple's current Xcode documentation, covering the workspace, the build system and the debugger.
- Secure Keyboard Entry
Apple
How macOS Secure Keyboard Entry stops other apps from receiving key events.
FAQ
Questions people ask
Where can I see every Xcode keyboard shortcut?
In Xcode under Settings, Key Bindings. Every menu action and text operation is listed with its current shortcut, the list filters to Menu or Text actions, and a Conflicts view shows any combination claimed by two actions at once. It is also the only list that includes bindings you have changed yourself.
How do I change an Xcode keyboard shortcut?
Open Settings, Key Bindings, find the action, double-click its shortcut and type the new one, then click elsewhere to apply it. To remove one, use the Delete button beside the shortcut rather than the keyboard Delete key, which would assign Delete as the shortcut instead.
Does Apple publish a list of Xcode's keyboard shortcuts?
Not a current one. Apple's documentation covers the Key Bindings pane — how to view, filter, change and resolve conflicts between bindings — without printing the combinations. The only Apple tables of Xcode shortcuts are in a retired document last updated in 2011, which is too old to trust against a modern Xcode.
Why does a shortcut I found on a blog not work in my Xcode?
Usually version drift. Apple reassigns bindings between major Xcode releases, so a combination that was right two versions ago may now belong to a different action or to nothing at all. Search the Key Bindings pane by shortcut rather than by name to see what your Xcode thinks that combination does.
Why do the F6, F7 and F8 stepping keys not work?
On most Mac keyboards the top row sends media keys unless you hold fn, or turn on the option to use F1, F2 and so on as standard function keys in System Settings under Keyboard. Xcode's stepping commands are the group most affected by this.
Are Xcode's shortcuts the same as VS Code's?
Rarely. The two editors agree on little beyond ⌘F, ⌘S and ⌘/. Jump to definition is ⌃⌘J in Xcode and F12 in VS Code; commenting matches; folding does not. Expect to relearn rather than translate, and expect the muscle memory to fight you for a week.
Does Show KeyPress need a plugin or a source editor extension?
No. It has no Xcode integration of any kind. It draws keystrokes on screen and nothing more, which is why it behaves the same in Xcode, in a terminal, or in any other app you switch to mid-demo.