
App shortcuts
Notion keyboard shortcuts for Mac
Notion is a keyboard application wearing a mouse-driven interface. The chords are where the speed lives.
The ones to learn first
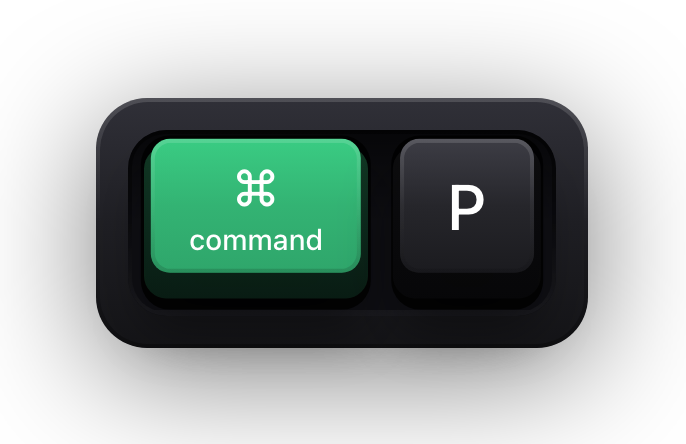
A large Notion workspace is a navigation problem long before it is a writing problem. ⌘P is the answer to most of it: it opens search and lists recently viewed pages, so moving across the workspace never involves the sidebar.
⌘K is the one chord that does two jobs. With text selected it turns that text into a link; with nothing selected it opens the same search Notion opens for ⌘P, which is why both appear against the same description in Notion's own list.
The two peek-view chords at the bottom are the ones nobody finds by accident. Opening a database row gives you a side panel, and from there ⌃⇧K and ⌃⇧J step to the previous and next row without closing it — which turns reviewing forty entries from forty round trips into one pass.
| Shortcut | What it does |
|---|---|
| ⌘P | Open search, or jump to a recently viewed page |
| ⌘F | Search inside the page you are on |
| ⌘L | Copy the current page's URL |
| ⌘[ | Go back a page |
| ⌘] | Go forward a page |
| ⌘⇧U | Go up one level, to the parent page |
| ⌘⇧L | Switch between dark and light mode |
| ⌃⇧K | Go to the previous database page while in peek view |
| ⌃⇧J | Go to the next database page while in peek view |
| ⌘+ / ⌘- | Zoom in or out |
Formatting text as you write
These act on whatever you have selected, and they are the same chords whether you are in a page, a database entry or a comment thread. ⌘E for inline code is the one worth building a habit around if you write anything technical in Notion.
⇧Return is the quiet one. Return ends the block and starts a new one; ⇧Return inserts a line break inside the block you are already in, which is how you get a two-line callout or a wrapped list item without splitting it in half.
| Shortcut | What it does |
|---|---|
| ⌘B | Bold the selected text |
| ⌘I | Italicise the selected text |
| ⌘U | Underline the selected text |
| ⌘⇧S | Strike through the selected text |
| ⌘E | Format the selected text as inline code |
| ⌘K | Add a link to the selected text |
| ⌘⇧H | Apply the last text or highlight colour you used |
| ⌘⇧M | Create a comment |
| ⌘V | Paste a URL over selected text to turn it into a link |
| ⌃⌘Space | Open the emoji picker |
| Return | Insert a new line of text |
| ⇧Return | Insert a line break inside the current block |
| ⌘R / ⌘D | In a table, fill the cells to the right or below |
Creating blocks
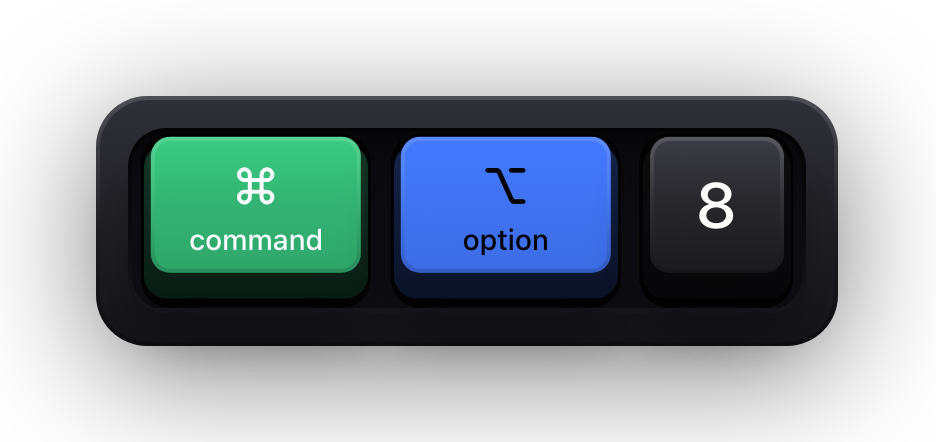
Everything in Notion is a block, so the shortcuts that create blocks are the ones that actually replace the mouse. The ⌘⌥ number run converts the block your cursor is in to a different type without opening the slash menu at all — and because it converts rather than inserts, it doubles as the fix for a block type you picked by accident.
This is also the run that most often gets mis-transcribed. On Windows the same commands use Ctrl and Shift; on macOS they use ⌘ and ⌥. A list that tells you ⌘⇧1 makes a heading has been translated from the Windows column by someone who did not check.
Tab and ⇧Tab sit here rather than with the movement shortcuts because in Notion they do not move the cursor — they change the structure of the page, nesting a block under the one above it or pulling it back out.
| Shortcut | What it does |
|---|---|
| ⌘⌥0 | Turn the current block into plain text |
| ⌘⌥1 | Turn the current block into a heading 1 |
| ⌘⌥2 | Turn the current block into a heading 2 |
| ⌘⌥3 | Turn the current block into a heading 3 |
| ⌘⌥4 | Turn the current block into a to-do checkbox |
| ⌘⌥5 | Turn the current block into a bulleted list item |
| ⌘⌥6 | Turn the current block into a numbered list item |
| ⌘⌥7 | Turn the current block into a toggle list |
| ⌘⌥8 | Turn the current block into a code block |
| ⌘⌥9 | Create a new page |
| Tab | Indent and nest the current block |
| ⇧Tab | Un-nest the current block |
Selecting and moving blocks
The selection chords are worth reading as a group. Pressing esc selects the block you are inside; from there the arrow keys move between blocks, ⇧ with an arrow extends the selection, and Return drops you back into editing the text. Everything else in this table operates on whatever that selection ended up being.
⌘⇧ with an arrow key moves the selected blocks up and down the page, which is the fastest way to reorder a document without picking anything up with the pointer.
| Shortcut | What it does |
|---|---|
| esc | Select the block your cursor is in, or clear the current selection |
| ⌘A | Select the block your cursor is in |
| arrow keys | Move the selection between blocks |
| ⇧↑ / ⇧↓ | Expand the selection up or down |
| ⇧click | Select another block and everything between it and the current selection |
| ⌘⇧click | Select or deselect an entire block |
| Return | Start editing the text in the selected block |
| ⌘/ | Edit or change the selected blocks |
| ⌘Return | Modify the current block |
| ⌘D | Duplicate the selected blocks |
| backspace / delete | Delete the selected blocks |
| ⌘⇧ + arrow keys | Move the selected blocks around the page |
| ⌥ + drag | Duplicate content as you drag it |
| ⌘⌥T | Expand or collapse every toggle on the page |
| space | Open the selected image full-screen, or leave full-screen |
Windows and tabs in the desktop app
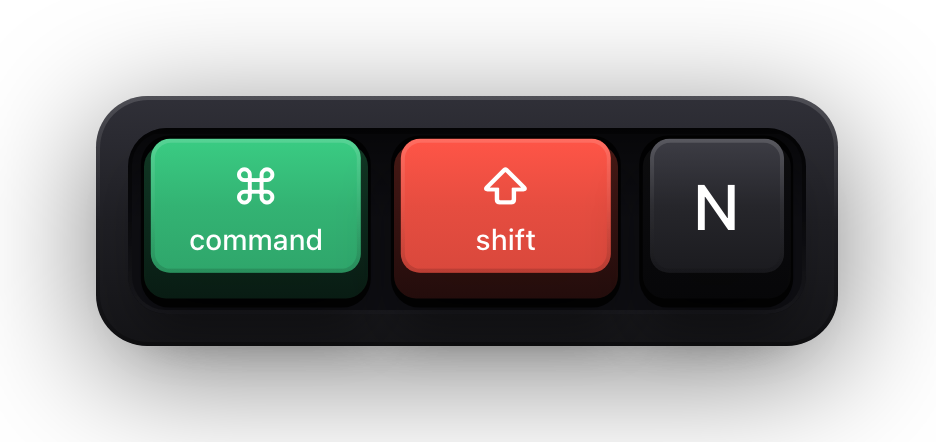
The Notion desktop app has its own small set of window commands, and they are the reason the desktop app is worth using over the browser if you keep several projects open. Tabs behave like a browser's, so ⌘T and ⌘click do roughly what your hands already expect.
These are also the only shortcuts on this page that genuinely do not work in a browser. Chrome and Safari claim ⌘T and ⌘N for their own tabs and windows long before the page underneath gets a look at them, which is why a shortcut a colleague swears by can appear broken on your machine for no reason other than where you opened Notion.
| Shortcut | What it does |
|---|---|
| ⌘N | Create a new page |
| ⌘⇧N | Open a new Notion window |
| ⌘T | Create a new Notion tab |
| ⌘click | Open a link in a new Notion tab |
| ⌥⇧click | Open a page as a new window |
Typed triggers: markdown, @, [[ and +
Notion also accepts a set of typed triggers, which are not strictly keyboard shortcuts but replace them. They fire the moment you type the trigger, so for creating a block from scratch they beat any chord — and unlike the chords, they read as ordinary typing on a recording, which is worth knowing if you are demonstrating Notion to someone.
The three trigger characters do different jobs. Markdown converts what you have just typed, @ pulls a person, page or date into the text, and [[ or + creates or links a page. Slash is the general-purpose one: it opens the whole block menu, and typing a few more letters filters it.
- Wrap text in ** to make it bold, in * to italicise it, in ~ to strike it through, and in backticks to make it inline code.
- Start a line with *, - or + and a space to begin a bulleted list; type [] and a space for a to-do checkbox.
- Type #, ## or ### and a space for a heading 1, 2 or 3.
- Start a line with > and a space for a toggle list, or with a double quote and a space for a quote block.
- Type --- to insert a divider.
- Type @ followed by a person's name to mention them, a page name to link to it, or a date in any format — including yesterday, today or tomorrow.
- Type @remind followed by a date to set a reminder you will be notified about.
- Type [[ or + followed by a page name to link to that page, or to create a new sub-page from the menu that appears.
- Press / at any point to open the full menu of block types you can insert.
- Type /turn to convert the current block to another type, or /color to change its text or highlight colour.
Show your Notion shortcuts on screen
Notion shortcuts are unusually hard to teach, because the result is often subtle — a block changes type, a selection widens, a page opens. Watching a recording, someone sees the page reorganise itself and has no way to know whether that was ⌘⌥5, a slash command or a drag. Onboarding a team into a workspace runs into exactly this, over and over.
Show KeyPress is a paid macOS menu bar app that draws each press as a keycap on top of everything else on screen. It does not integrate with Notion, does not install anything into it, and does not record or edit video — it draws an overlay, and whatever is capturing your display captures that overlay with it. macOS 14 Sonoma or later, Mac App Store only.
- Shortcuts Only content mode shows chords like ⌘⌥7 while leaving the words you type into the page alone.
- Latest mode suits shortcut-by-shortcut teaching; Stacked History suits demos where the typing itself matters.
- Standalone modifiers have their own switch, so a bare ⌘ tap does not flash a keycap every few seconds.
- Eight edge presets plus a full-screen drag editor decide where the overlay sits, with a separate saved position per display.
- ⌃⌥M switches content mode mid-demo, and ⌃⌥= and ⌃⌥- resize the overlay without opening settings.
Sources and further reading
Product details and guidance were checked against these first-party pages on August 5, 2026. Re-check current listings before making an install or high-stakes decision.
- Keyboard shortcuts
Notion
Notion's own shortcut reference, listing the Mac chord alongside the Windows one for every command.
- Control access to input monitoring on Mac
Apple
Apple's guide to the Input Monitoring privacy permission and how to grant or revoke it.
- Show KeyPress on the Mac App Store
Apple
The listing, with the current price, system requirements and version history.
FAQ
Questions people ask
Are Notion's Mac shortcuts different from the Windows ones?
Yes, though the mapping is mostly mechanical: where Windows uses Ctrl, macOS uses ⌘, and in the block-type run Windows uses Shift where macOS uses ⌥. A few genuinely differ — database peek navigation is ⌃⇧K and ⌃⇧J on a Mac against ⌃K and ⌃J on Windows. Notion publishes both in the same reference, and every chord here is the macOS one.
What does ⌘K do in Notion?
It depends on your selection. With text selected it turns that text into a link. With nothing selected it opens search, the same as ⌘P — which is why both appear in Notion's own list against the same description.
Can I remap Notion's keyboard shortcuts?
Notion does not offer general remapping of these chords. macOS can assign shortcuts to menu commands in System Settings under Keyboard, Keyboard Shortcuts, App Shortcuts, but the in-page editing chords listed here are built into the editor and are not exposed as menu commands.
Why does a Notion shortcut work in the desktop app but not in my browser?
The window and tab commands — ⌘T, ⌘N, ⌘⇧N, ⌥⇧click — belong to the desktop app. In a browser those chords are claimed by the browser itself before Notion ever sees them. The in-page editing and block shortcuts work in both.
How do I show my Notion shortcuts in a screen recording?
Run a keystroke overlay while you record. Show KeyPress draws each press on screen as a keycap, so a recorder capturing that display captures the keys along with the page. There is no plugin and no recorder integration — it works because it is simply on screen.
Does Show KeyPress run on Windows?
No. It is a macOS-only app and needs macOS 14 Sonoma or later. There is no Windows or Linux version, and no free tier.