
App shortcuts
Final Cut Pro keyboard shortcuts for Mac
Final Cut is a keyboard application wearing a mouse interface. The editors who look fast are the ones who stopped reaching for the toolbar.
How Final Cut organises its shortcuts
Every default shortcut in Final Cut Pro is a binding to a named command, and Apple's reference lists them that way: the action, the command it triggers, and the keys. That structure is why the groups below are the ones Apple uses — editing, marking, playback, effects, view, windows — rather than an alphabetical dump.
It also explains something that surprises new editors. Bare letters do the heavy lifting. E, W, D and Q are the four ways a clip enters the timeline; A, T, P, B, Z and H are tools; I and O set the range you are about to use. Modifier chords are mostly reserved for the less frequent commands.
One consequence is worth knowing before you memorise anything: the same key can mean two things depending on which pane is active. Apple notes this explicitly for Delete, which removes the timeline selection when the timeline is active and rejects the browser selection when the browser is.
Play, skim and move the playhead
JKL is the oldest muscle memory in video editing and Final Cut keeps it. Pressing L or J repeatedly steps the playback speed up, which is how you scrub a long clip without touching the mouse.
| Shortcut | What it does |
|---|---|
| Space | Start or pause playback |
| L | Play forward — press again to increase the playback speed |
| J | Play in reverse — press again to increase the reverse playback speed |
| K | Stop playback |
| ⌥L | Play forward at half speed |
| ⌥J | Play in reverse at half speed |
| ⌥Space | Play from the playhead position |
| / | Play the selection |
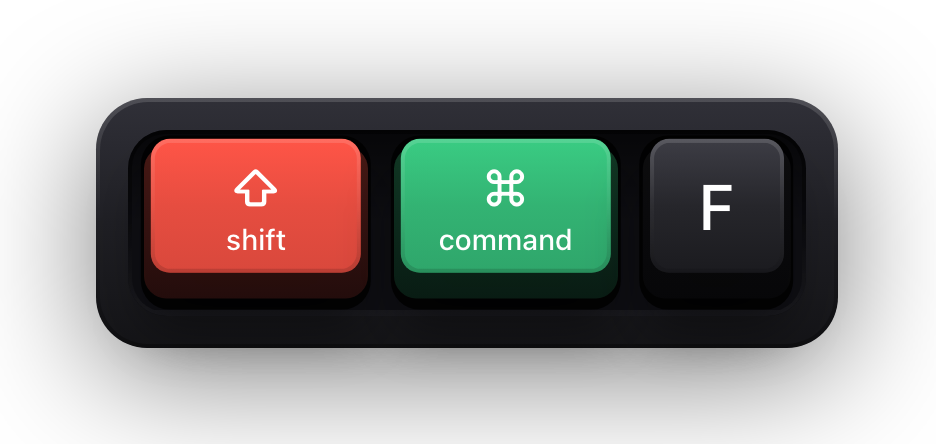
| ⇧⌘F | Play full screen from the skimmer or playhead position |
| S | Turn skimming on or off |
| ⇧S | Turn audio skimming on or off |
| ⌘L | Turn looped playback on or off |
| ← / → | Move the playhead to the previous or next frame |
| ⇧← / ⇧→ | Move the playhead back or forward 10 frames |
| ; / ' | Move the playhead to the previous or next edit point |
| ⌃; / ⌃' | Move the playhead to the previous or next marker |
| ⌃P | Move the playhead by entering a timecode value |
Mark ranges, rate clips and drop markers
Almost every edit in Final Cut starts with a range. I and O set its ends, and everything else in this group either adjusts that range or labels the clip so you can find it again.
| Shortcut | What it does |
|---|---|
| I | Set the start point for the range |
| O | Set the end point for the range |
| ⌥I | Clear the range's start point |
| ⌥O | Clear the range's end point |
| ⌥X | Clear the range selection |
| X | Set the range to the boundaries of the clip below the skimmer or playhead |
| ⇧I / ⇧O | Move the playhead to the start or end of the range selection |
| ⌘A | Select all clips |
| ⇧⌘A | Deselect all selected items |
| M | Add a marker at the location of the skimmer or playhead |
| ⌥M | Add a marker and edit the marker's text |
| ⌃M | Delete the selected marker |
| ⌃⇧M | Delete all of the markers in the selection |
| F | Rate the browser selection as favorite |
| U | Remove ratings from the selection |
| ⌃1 to ⌃9 | Apply keyword 1 to 9 to the selection |
| ⌃0 | Remove all keywords from the browser selection |
| ⌃F | Change the browser filter settings to show favorites |
| ⌃H | Change the browser filter settings to hide rejected clips |
Append, insert, overwrite and connect
These four are the reason Final Cut editors keep a hand on the keyboard. Each one puts the browser selection into the timeline in a structurally different way, and choosing between them with a single key is what stops an assembly edit from becoming a dragging exercise.
| Shortcut | What it does |
|---|---|
| E | Append the selection to the end of the storyline |
| W | Insert the selection at the skimmer or playhead position |
| D | Overwrite at the skimmer or playhead position |
| ⇧D | Overwrite backtimed from the skimmer or playhead position |
| Q | Connect the selection to the primary storyline |
| ⇧Q | Connect the selection backtimed to the playhead |
| ⌥W | Insert a gap clip at the skimmer or playhead position |
| ⌥F | Insert or connect a freeze frame |
| ⌥⌘W | Insert the default generator at the skimmer or playhead position |
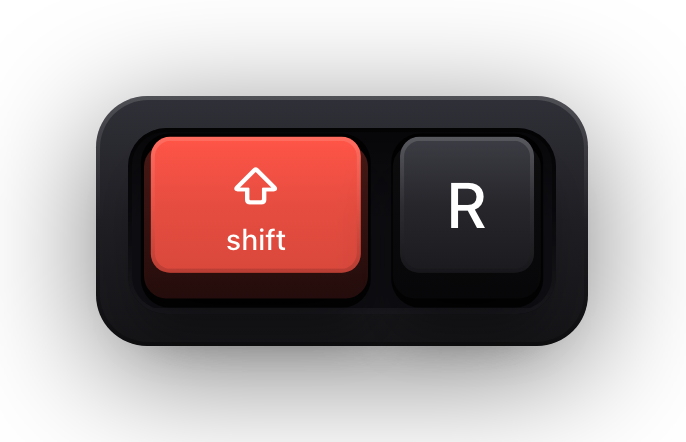
| ⇧R | Replace the selected timeline clip with the browser selection |
| ⌥R | Replace the selected clip, starting from the browser selection's start point |
| ⇧Delete | Replace the selected timeline clip with a gap clip |
| ⌘V | Insert the Clipboard contents at the skimmer or playhead position |
| ⌥V | Paste the selection and connect it to the primary storyline |
| ⌥⌘↓ | Overwrite the selected connected clip into the primary storyline |
| ⌥⌘↑ | Lift the selection from the storyline |
| ⌘G | Create a storyline from a selection |
| ⌥G | Create a new compound clip |
Blade, trim and nudge
Trimming is where the bracket keys earn their place. Left bracket selects the left edge of an edit point, right bracket the right, and backslash grabs both at once — after which the arrow keys or the nudge shortcuts do the actual work.
| Shortcut | What it does |
|---|---|
| ⌘B | Cut the primary storyline clip, or the selection, at the skimmer or playhead |
| ⇧⌘B | Cut all clips at the skimmer or playhead location |
| [ | Select the left edge of the edit point |
| ] | Select the right edge of the edit point |
| \ | Select the left and right edges of the edit point |
| ⌥[ | Trim the clip start point to the skimmer or playhead position |
| ⌥] | Trim the end of the selected or topmost clip to the skimmer or playhead |
| ⌥\ | Trim clip start and end points to the range selection |
| ⇧X | Extend the selected edit point to the skimmer or playhead position |
| , / . | Nudge the selection one unit to the left or right |
| ⇧, / ⇧. | Nudge the selection 10 units to the left or right |
| ⌃D | Change the duration of the selection |
| N | Turn snapping on or off |
| ⌃E | Show or hide the precision editor for the selected edit point |
| Delete | Delete the timeline selection, reject the browser selection, or remove a through edit |
| ⌥⌘Delete | Delete the selection and attach connected clips to the resulting gap clip |
Switch tools and work with audio
The tool keys are single letters with no modifier, which is the fastest possible binding and also the easiest to trigger by accident while a text field is not focused. Audio gets its own set built around the Control key.
| Shortcut | What it does |
|---|---|
| A | Make the Select (Arrow) tool active |
| T | Make the Trim tool active |
| P | Make the Position tool active |
| R | Make the Range Selection tool active |
| B | Make the Blade tool active |
| Z | Make the Zoom tool active |
| H | Make the Hand tool active |
| ⇧C | Make the Crop tool active and show its onscreen controls |
| ⇧T | Make the Transform tool active and show its onscreen controls |
| ⌥D | Make the Distort tool active and show its onscreen controls |
| ⌃S | View audio and video separately for the selected clips |
| ⌃⇧S | Make the audio component a connected clip |
| ⌃⌥S | Expand or collapse audio components for the selection |
| ⌃= / ⌃- | Raise or lower the audio volume by 1 dB |
| ⌃L | Adjust the audio volume across all selected clips by the same dB value |
| ⌃⌥L | Adjust the audio volume across all selected clips to a specific dB value |
| ⌥S | Solo the selected items in the timeline |
Effects, titles and retiming
Copying an effect and pasting it onto twenty clips is one of the few places where a shortcut changes the shape of an afternoon rather than saving a second. Note that pasting effects and pasting attributes are separate commands with separate keys.
| Shortcut | What it does |
|---|---|
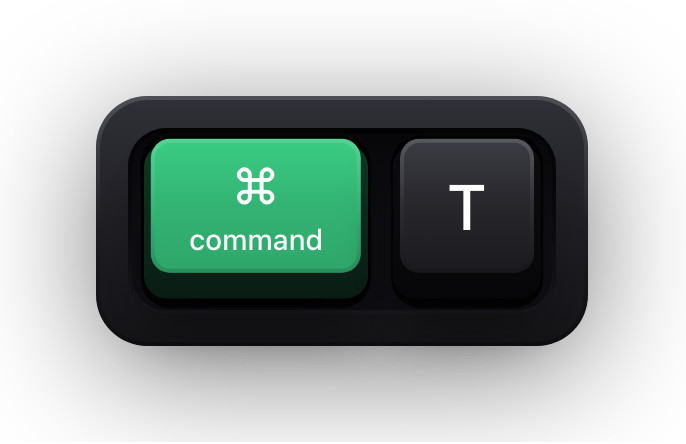
| ⌘T | Add the default transition to the selection |
| ⌥E | Add the default video effect to the selection |
| ⌥⌘E | Add the default audio effect to the selection |
| ⌃T | Connect a basic title to the primary storyline |
| ⌃⇧T | Connect a basic lower-third title to the primary storyline |
| ⌥A | Add an adjustment clip at the skimmer or playhead position |
| ⌥⌘O | Add the Color Adjustments effect |
| ⌥T | Apply a crossfade to the audio edit point between the selected clips |
| ⌥⌘C | Copy the selected effects and their settings |
| ⌥⌘V | Paste effects and their settings to the selection |
| ⇧⌘V | Paste selected attributes and their settings to the selection |
| ⌥⌘X | Remove all effects from the selection |
| ⇧⌘X | Remove selected attributes from the selection |
| ⌘R | Show or hide the retime editor in the timeline |
| ⇧H | Create a 2-second hold segment |
| ⇧N | Set the selection to play at normal (100 percent) speed |
| ⌥⌘R | Reset the selection to play forward at normal speed |
| ⌥⌘M | Match color between clips |
| ⇧⌘M | Match the sound between clips |
Windows, zoom and the interface
The number row moves focus between the three panes and toggles the browsers. Learning ⌘1, ⌘2 and ⌘3 alone removes most of the clicking that happens between an edit and the next one.
| Shortcut | What it does |
|---|---|
| ⌘1 | Make the browser active |
| ⌘2 | Make the timeline active |
| ⌘3 | Make the viewer active |
| ⌘4 | Show or hide the inspector |
| ⌘5 | Show or hide the Effects browser |
| ⌃⌘5 | Show or hide the Transitions browser |
| ⌘6 | Make the Color inspector active and add the Color Adjustments effect |
| ⌘7 | Show or hide the video scopes in the viewer |
| ⌘9 | Show or hide the Background Tasks window |
| ⌘K | Show or hide the keyword editor |
| ⇧⌘2 | Show or hide the timeline index for the open project |
| ⌘` | Show or hide the sidebar |
| ⌘+ / ⌘- | Zoom in to or out of the browser, viewer or timeline |
| ⇧Z | Zoom the contents to fit the browser, viewer or timeline |
| ⌥⇧Z | Zoom the timeline contents to fit the height of the timeline |
| ⌘I | Import media from a device, a camera or an archive |
| ⌘E | Share the selected project or clip using the default destination |
| ⌘N | Create a new project |
| ⌥N | Create a new event |
| ⌥⌘K | Open the Command Editor |
Showing the shortcuts on screen with Show KeyPress
A Final Cut tutorial has a specific problem: the interface barely moves. You press D and a clip appears in the timeline; you press ⇧X and an edit point slides. A viewer sees the result and has no way to work backwards to the cause, because the cause happened under your hands.
Show KeyPress is a paid macOS menu bar app, from the Mac App Store, for macOS 14 or later. It draws the keys you press as keycaps on top of whatever is on screen. That is the whole of what it does — worth stating plainly on a page about video software, because it is not a recorder, not an editor, and not a Final Cut plugin. It does not integrate with Final Cut Pro in any way, installs nothing into it, and never touches your library or your media.
The consequence of having no integration is that there is nothing to configure. The overlay is an ordinary always-on-top window, so any recorder capturing that display captures the keycaps with it. Capture scoped to a single application window is the exception, since the overlay is drawn outside that window.
- Three reading modes: Latest for one combination at a time, Horizontal History for a row of recent keycaps, Stacked History for continuous typing grouped into fragments.
- Shortcuts Only keeps the overlay quiet while you type a clip name, and shows the chords when they matter — a good fit for Final Cut's mix of bare letters and modifier combinations.
- Six global shortcuts: ⌘⇧K toggles all the visualization, ⌃⌥H the cursor halo, ⌃⌥M the content mode, ⌃⌥P the position editor, and ⌃⌥= and ⌃⌥- the overlay size.
- A separate placement per physical display, with Follow Pointer, One Display and Selected Displays targeting — useful when the timeline is on one screen and the viewer on another.
- Input Monitoring is the only privacy permission it requests: not Accessibility, not Screen Recording.
- The keyboard and pointer overlays are click-through, so nothing intercepts a click meant for the timeline underneath.
Sources and further reading
Product details and guidance were checked against these first-party pages on August 5, 2026. Re-check current listings before making an install or high-stakes decision.
- Keyboard shortcuts in Final Cut Pro for Mac
Apple
Apple's own command reference for Final Cut Pro, listing every default shortcut with the command it maps to.
- Modify keyboard shortcuts in Final Cut Pro for Mac
Apple
Apple's guide to the Command Editor, where Final Cut Pro shortcuts are viewed, customised and saved as command sets.
- Control access to input monitoring on Mac
Apple
Apple's guide to the Input Monitoring privacy permission and how to grant or revoke it.
FAQ
Questions people ask
Where does Final Cut Pro list its own keyboard shortcuts?
In the Command Editor. Choose Final Cut Pro > Command Sets > Customize, or press ⌥⌘K. Apple's Command Editor provides the shortcut set in English, Japanese, French and German, and it is also where you create custom shortcuts or substitute ones from another application.
Why does Delete do two different things?
Because it depends on which pane is active. Apple documents Delete as deleting the timeline selection, rejecting the browser selection, or removing a through edit — the Delete key removes selected items if the timeline is active instead of the browser.
What is the difference between Insert, Overwrite and Connect?
W inserts the selection at the skimmer or playhead, pushing everything after it later. D overwrites at the skimmer or playhead, replacing whatever was there. Q connects the selection to the primary storyline, attaching it above or below rather than changing the storyline's length.
Does Show KeyPress record or edit video?
No. It draws your key presses on screen as an overlay and does nothing else — no recording, no editing, no export. Pair it with the macOS screen recording tools, OBS Studio, or whatever you already use.
Does Show KeyPress install a Final Cut Pro plugin?
No. There is no plugin, no effect, no generator and no integration of any kind. It is a separate menu bar app that draws an always-on-top window, which is exactly why it works with any recorder that captures a display.
Will my password appear on the overlay while I am recording?
No. While macOS Secure Input is active — in password fields, and in terminals with Secure Keyboard Entry on — applications stop receiving key events, and the keycaps are cleared. A short banner reading Keyboard hidden — Secure Input appears in their place, and that banner can be switched off under General.